SUMMARY Learn about how to create rollout packages for Juniper Secure Connect application software and step-by-step procedures to install Juniper Secure Connect on macOS platform. If you want to install Juniper Secure Connect application, see Manual Installation of Juniper Secure Connect. If you are an administrator, see Create Rollout Packages for Juniper Secure Connect Installation section to prepare the installer for software rollout.
Download the Juniper Secure Connect application software from here. See release notes for more details.
For more information on Juniper Secure Connect GUI elements, see Juniper Secure Connect GUI Elements.
For more information on Juniper Secure Connect features and how to configure the options, see Connection Menu, View Menu, Log Menu, and Help Menu.
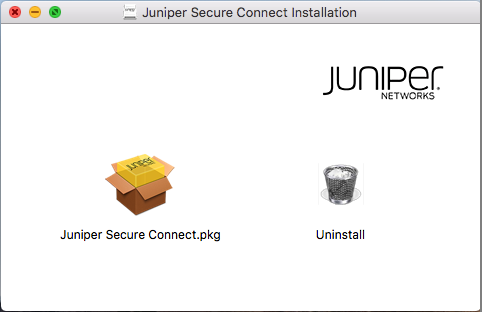
Following are the steps to install the Juniper Secure Connect on your macOS machine.
Figure 1: Juniper Secure Connect Installer
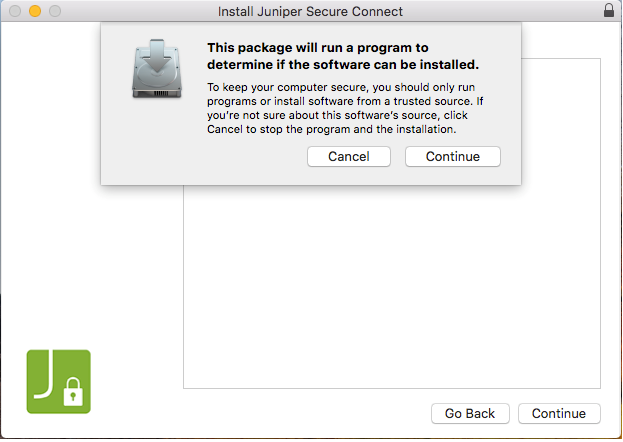
Figure 2: Trusted Resource Verification Pop-up Window
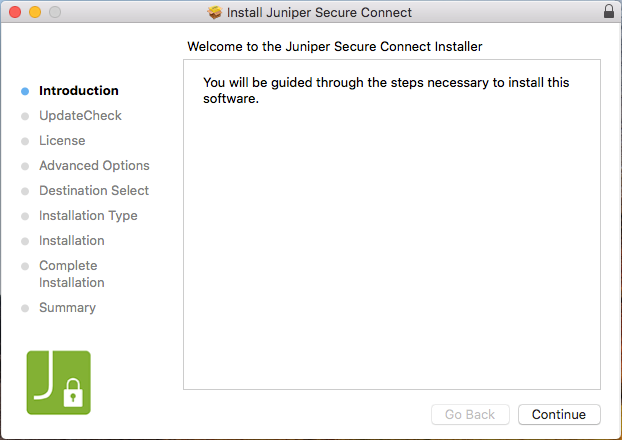
Figure 3: Installer Welcome Window
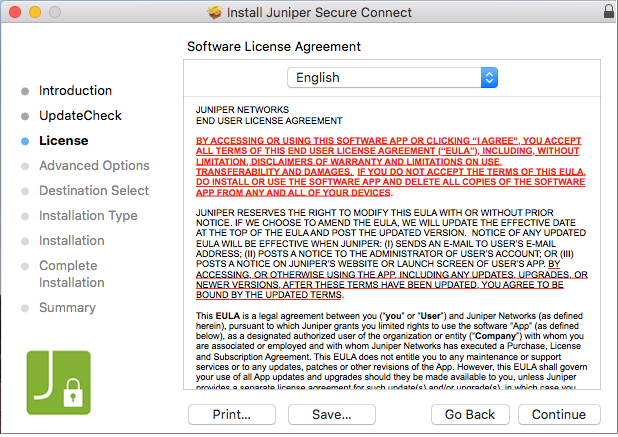
Figure 4: License Agreement Window
Read the license agreement carefully. If you accept the terms, then select I accept the terms in the license agreement check box to accept the license agreement. Click Continue . See Figure 5. You can also save or print the software license agreement. To continue the installation, you must agree to the terms of the software license agreement and click Continue .

Figure 5: Agree or Cancel License Agreement
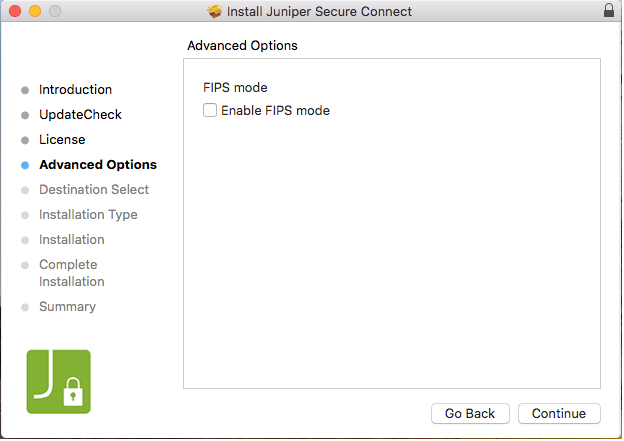
Figure 6: Configure FIPS Mode Option
Note: The SRX Series Firewall and the Juniper Secure Connect application are independent FIPS compliant products. For remote access VPN solution on FIPS evaluated SRX Series Firewall, see Juniper Secure Connect.
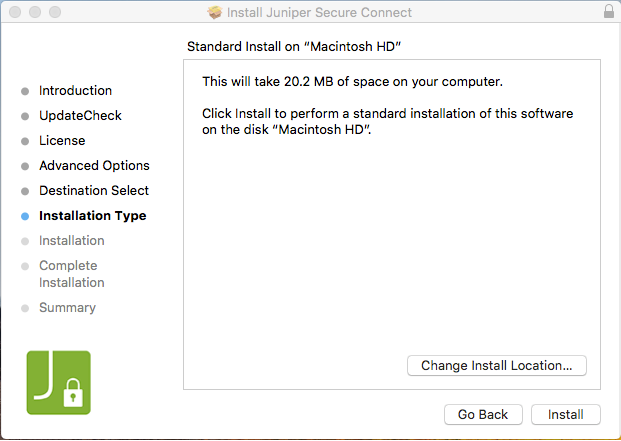
Figure 7: Start Juniper Secure Connect Installation
A pop-up message as shown in Figure 8 is displayed to confirm restarting the computer when the installation is complete. Click Continue Installation to confirm restart.
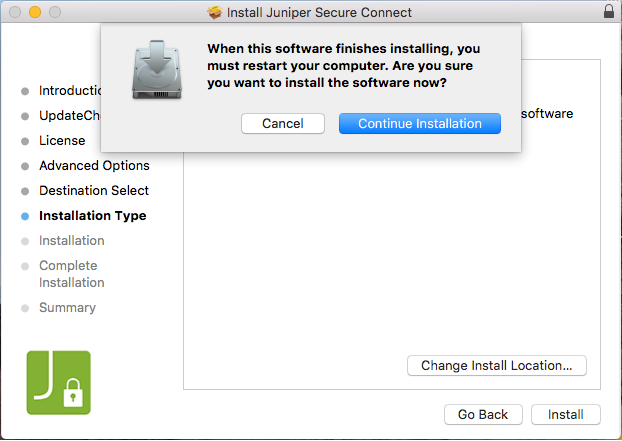
Figure 8: Confirm Restart after Installation
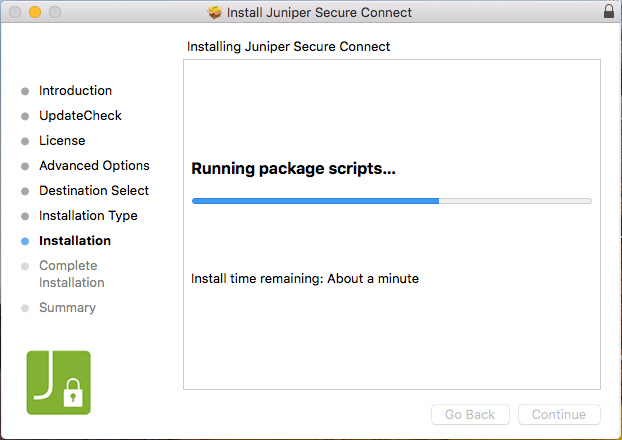
Figure 9: Running Juniper Secure Connect Installation Package
Figure 10 shows an example of the Juniper Secure Connect installation window when the installation is successfully completed.

Figure 10: Juniper Secure Connect Installation Completed
Congratulations! The Juniper Secure Connect application is successfully installed in your Mac.You can also enter a fully qualified domain name (FQDN) in the Gateway Address URL to connect with the SRX Series Firewall. For example: https://vpn.juniper.net. After entering the gateway address, click the connection toggle button to establish connection manually to the destination system. You can also select Connection > Connect from the menu bar to manually establish a VPN connection. When the connection is established successfully, the application window minimizes in the task bar.
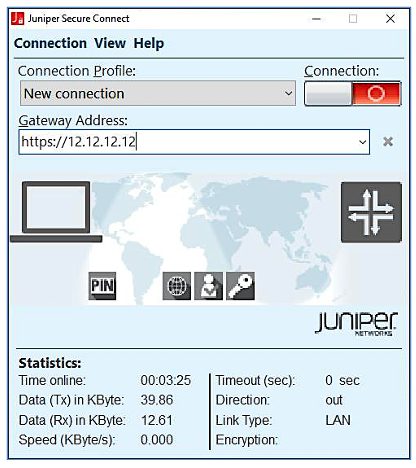
Figure 11: Launch Juniper Secure Connect
Juniper Secure Connect for macOS allows you to add your own logo or branding image. It also allows you to add HTML page for the branding image that would open when you click on the branding area in the Juniper Secure Connect. The HTML page is optional where you can provide any information you want. You should customise the installation package for branding your client. For detailed instructions, see Create Rollout Packages for Juniper Secure Connect Installation (macOS) .
Figure 12 is the sample screen, where the customizable branding area is highlighted:
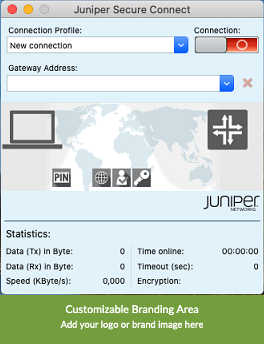
Figure 12: Custom Branding Option (macOS)
As a system administrator, you can also build your own rollout packages, if required. Building the rollout packages is an optional step. When you create rollout packages for Juniper Secure Connect application, you can install the application across the organization. Read the following steps to learn how you, as a system administrator can prepare the Juniper Secure Connect installer for the software rollout.
Juniper Secure Connect provides the installer for macOS as a disk image ( .dmg ) file. First you need to mount the package that is located inside the .dmg file. To do this, double-click its icon in the Finder . It should then mount the image and display its contents. You can see the installer package and the uninstall program when you double-click the image file in the Finder window.
Note that the .dmg file is write-protected and as a system administrator you must first convert the .dmg file into a read or write format. You also must convert and resize the image before distributing the installer to users.
\Users\. \Documents\JuniperSecureConnect\ImportDir \Users\. \Documents\JuniperSecureConnect\ImportDir\cacerts \Users\. \Documents\JuniperSecureConnect\ImportDir\certs
\Users\. \Documents\JuniperSecureConnect\ImportDir \Users\. \Documents\JuniperSecureConnect\ImportDir\cacerts\[GENERAL] Picture=\Users\. \Documents\JuniperSecureConnect\ImportDir\cbo.png HtmlLocal=\Users\. \Documents\JuniperSecureConnect\ImportDir\cbo.html
For EAP-TLS authentication, you must save the user certificates only with name user.p12 in below directory. \Users\. \Documents\JuniperSecureConnect\ImportDir\certs\ Ensure that user certificate is unique for each installation package.
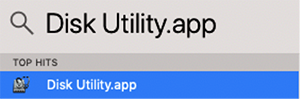
Figure 13: Disk Utility
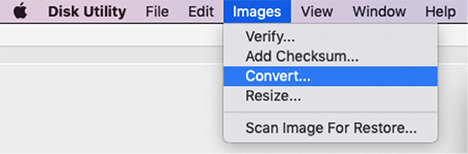
Figure 14: Convert an Image
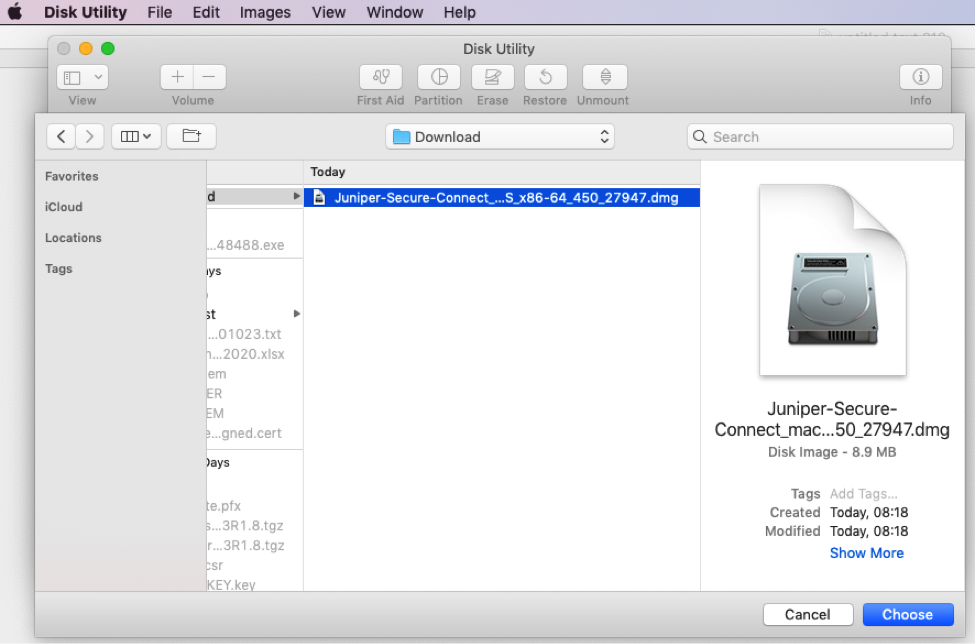
Figure 15: Select Juniper Secure Connect Image
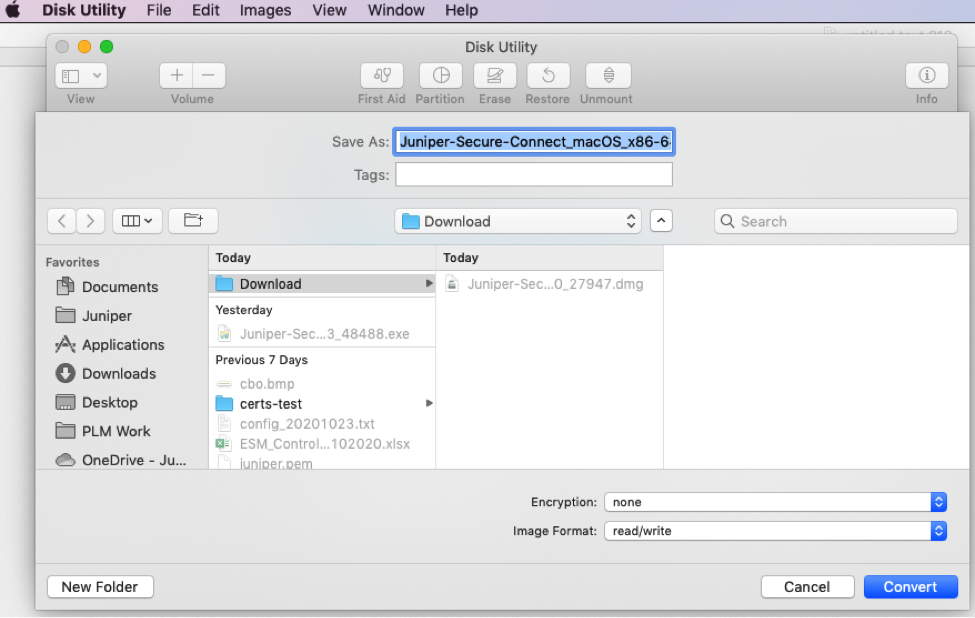
Figure 16: Update Image Format
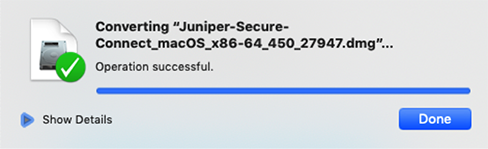
Figure 17: Image Conversion Process
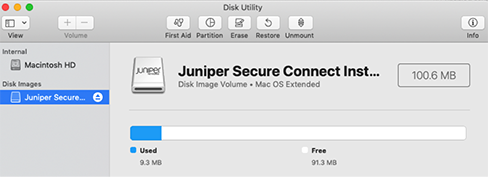
Figure 18: Unmount Process
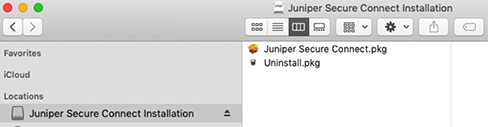
Figure 19: Mount the new Image
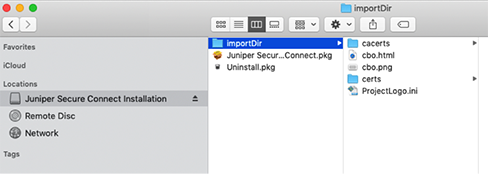
Figure 20: Copy ImportDir Folder To Mount Drive
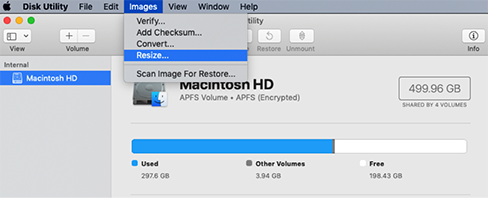
Figure 21: Navigate to Resize Image Option
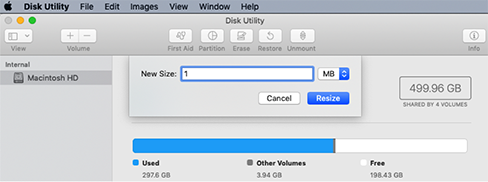
Figure 22: Resize Image
You’ve successfully created the rollout package and ready to distribute Juniper Secure Connect installer. The newly created .dmg file is the installer.