
Audiophile or Audio-Phool? I don’t claim to have golden ears with magical properties or any ability to create music. But I have a deep appreciation for music, founded at a young age and curated over the years. I run the Headphone Audio, Headphone Gear for Sale, and Headphone Offers groups.
Updated on September 3, 2021
We independently review all our recommendations. Purchases made via our links may earn us a commission. Learn more ❯
The hardware and software you need to make meaningful measurements of your IEM and chart its frequency response graph.
Armed with the combination of a limited budget and realistic expectations, we purchased a miniDSP EARS headphone test fixture to standardize our headphone frequency response measurements.
After trying it out, I created a couple of articles about the EARS to share my experiences in using the device. First, I look at what the EARS is, what it can do, and the inherent limitations in using the EARS for measurements. The second article is a step-by-step guide on how to measure headphones using the EARS.
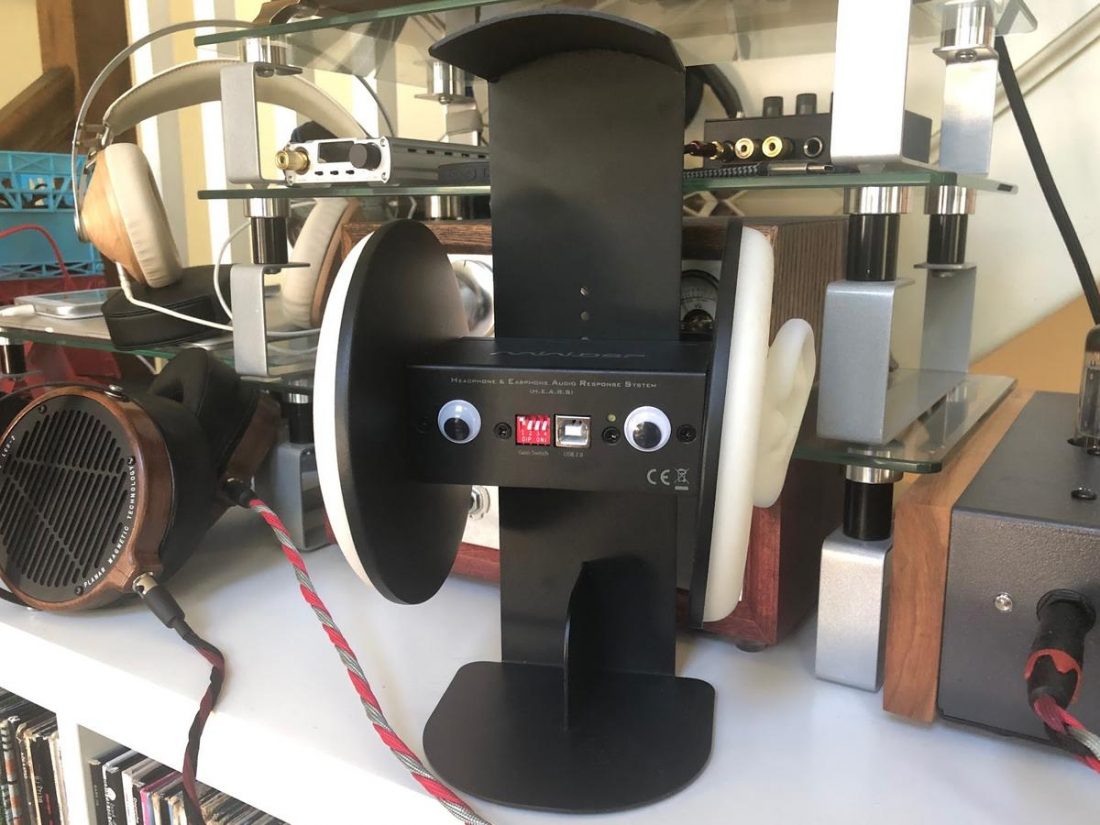
“The EARS is a testing rig that uses microphones fitted in simulated ears to record data via a computer connection. Test tones are played through a pair of headphones fitted on the device.
The EARS comes pre-assembled as a unit consisting of a pair of molded silicone ears with embedded microphones, a rectangular USB interface box holding the ear plates, and a stamped steel stand. The stand is rounded on top to approximate the top of a human head and to hold the headphone band.
The USB interface box connects to a computer with a standard USB A-B printer cable and no driver is needed for use in Windows, Linux, or Apple OS. The USB interface powers the EARS and captures the input from the microphones.
The EARS is one of several commercial headphone measurement rigs on the market. It holds the distinction of being the most affordable (by a LARGE margin).” – An introduction to miniDSP EARS.
The original intent was to use the EARS to measure both full-sized headphones and IEMs. Unfortunately, while the EARS works just fine with full-sized headphones, some serious limitations were discovered when attempting to use it with IEMs.
I found it quite difficult to obtain repeatable results when measuring IEMs with the EARS.The shape and size of the ear canal in the EARS is short, cylindrical, and simply not natural. This limits the range of insertion depths and does not simulate the acoustic effects of the shape of the ear. It soon became apparent that there has to be something more suitable.
In This Article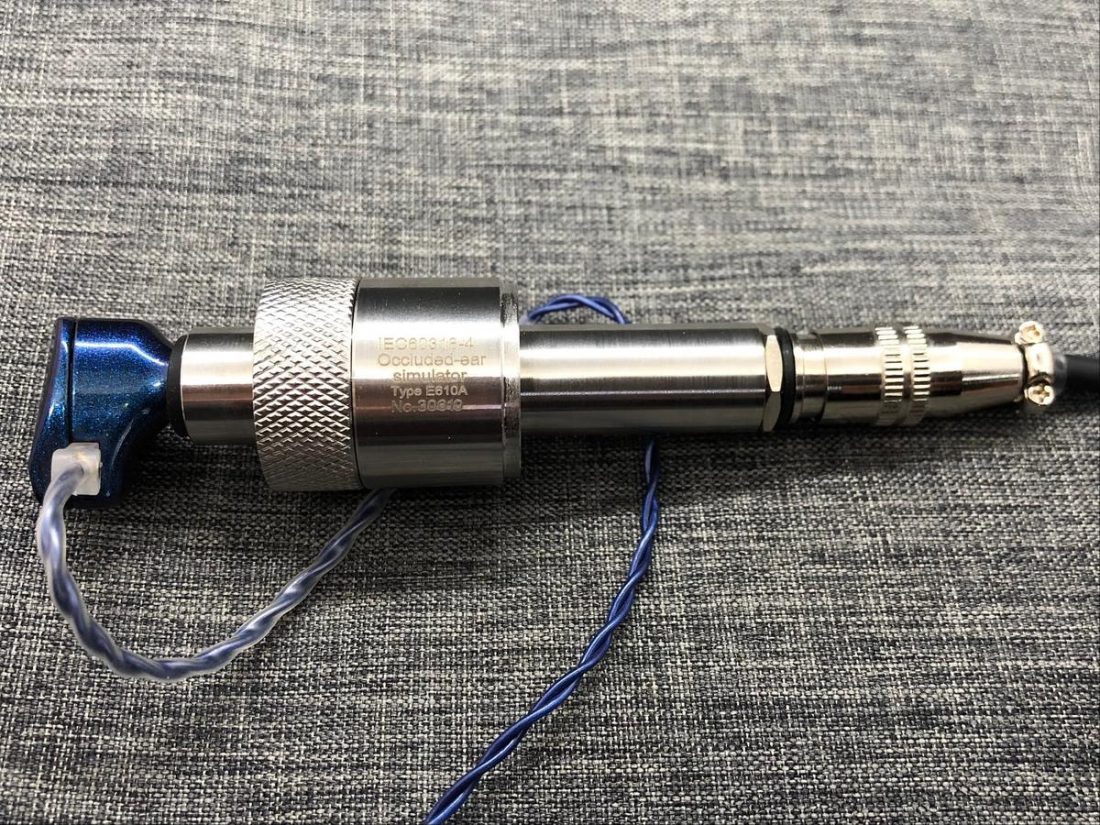
Ear simulators are standardized devices traditionally used for the calibration of earphones. To better mimic natural ear responses, ear simulators replicate the occlusion effect. This effect occurs when an ear canal is filled by a foreign object. This causes the person to hear a hollow or booming sound when speaking or listening.
The strange sound is due to the sound traveling via bone conduction to the cochlea. Acoustic pressure is increased in the occluded ear canal at low frequencies due to the vibration of the ear canal wall.
You can simulate this experience by plugging your ears with your fingers and talking.The lack of an occluded-ear simulator in the miniDSP EARS creates results that are quite different from measurements made with industry-standard rigs and creates non standard peaks due to canal response.
“The peak from the simulated ear canal is still present but lowered in frequency to about 2.5 kHz because of the IEM stopping up the end of the canal. There’s also the same relatively steep treble roll-off… Of course, different insertion depths or tip geometries will change these features greatly, which adds another layer of measurement uncertainty.” – AudioXpress
We have to remember that the most important factor in making headphone measurements is consistency.
We must be able to repeat and trust in the measurements we make. The tools and the processes that we follow to make the measurements must be consistent. This is the only way we can compare measurements.
We would be better off making measurements with an industry-standard occluded ear simulator device. Unfortunately, the standardized devices from a company like GRAS Sound and Vision are too expensive for the average consumer (like me).
This led me to take a look at what tools are being used to create the most respected online IEM measurement databases.
The search for an accepted standard basically started and ended with the extensive (approximately 800 IEMs at the time of writing) measurement database on In-Ear Fidelity. I reached out to Corin Ako (or Crinacle as he’s known online) and he was kind enough to answer my questions and point me in the right direction as to what gear he was using to create his database.
“I’m using a coupler specced to IEC60318-4… While it is not built by the usual trio of HATS manufacturers (Head Acoustics, GRAS and B&K), since it is built to standard it performs basically identical. I believe this coupler in particular is based off the B&K Type 4195.” – Crinacle in a personal email exchange
It turns out that with enough support, Crinacle was recently able to update his hardware closer to a (much more expensive) industry standard. “…I’ll be shifting to a GRAS KB5000/5001 setup with my existing IEC60318-4 coupler for headphone measurements, so basically a GRAS 43AG-4 but with a little extra DIY to fit my portability needs.”
From In-Ear Fidelity’s September 3 post, the new hardware consists of:
“Laptop PC > Room EQ Wizard > Motu M2 audio interface > B&K 1704-C-102 CCP signal conditioner (USB bus power) > GRAS RA0402 pre-polarised “high resolution” IEC603318-4 coupler > GRAS KB5000/KB5001 artificial pinna (right and left respectively) …
…the IEM database will continue to use my existing 711 coupler. Certainly not ideal given that it’s still slightly off from a GRAS RA0402 (though still well within IEC 60318-4 specifications), but the database is basically its own standard these days given the sheer volume of entries anyways. As such, continuing with the old coupler makes more sense to maintain precision, repeatability and comparability…”

Since this new level of hardware represents a significant financial commitment (the crowdfunding target was $9000 USD!), I decided that replicating In-Ear Fidelity’s previous setup, the one that produced the bulk of the measurements, would be ‘good enough’ for my measurement purposes.
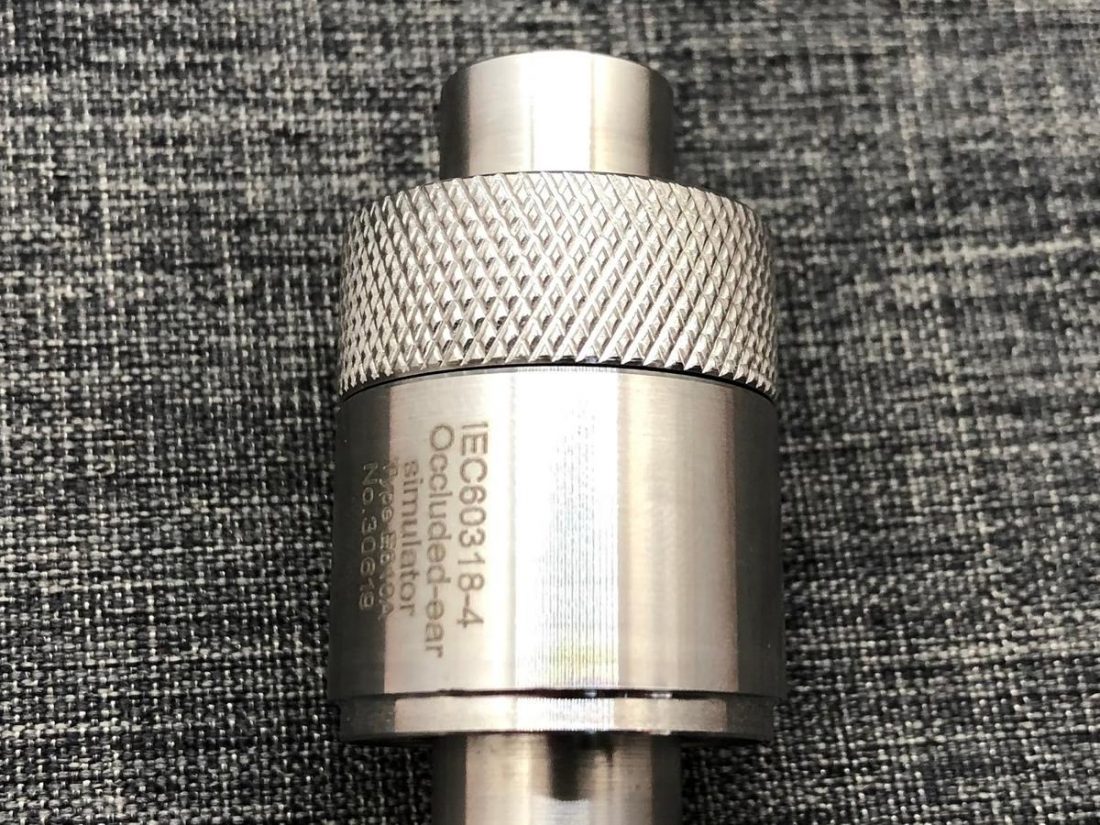
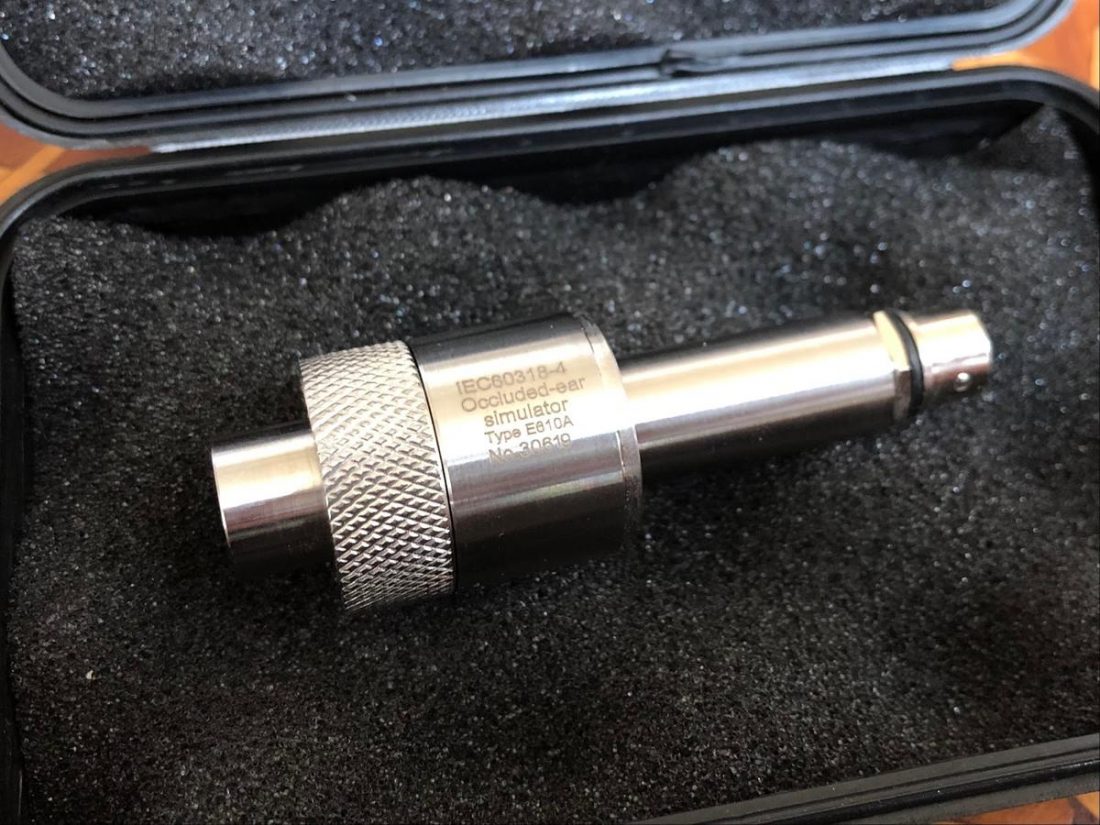
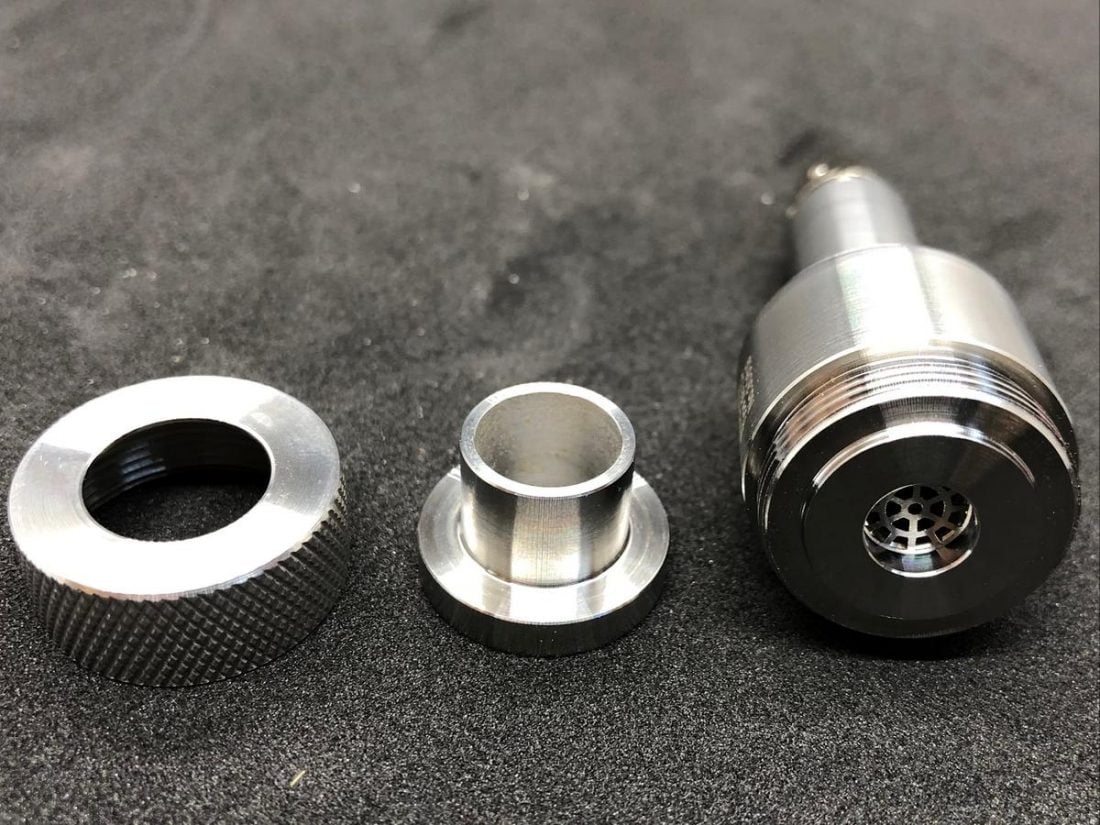
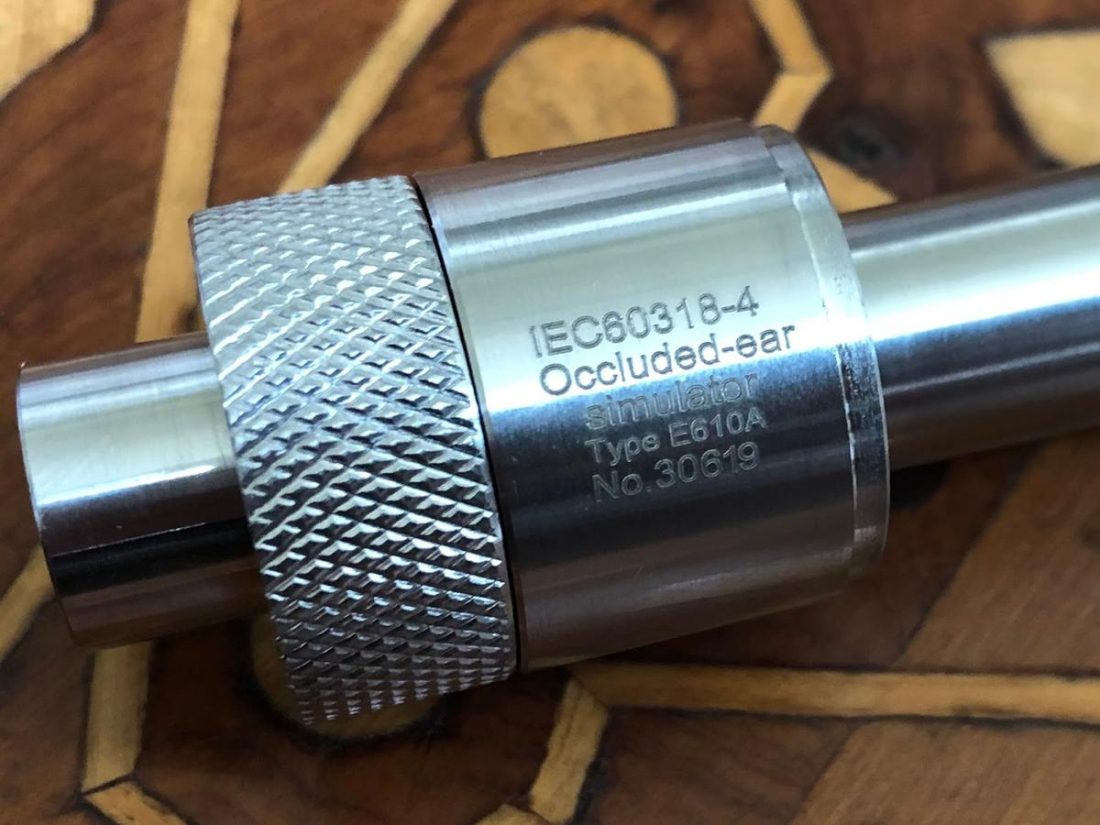
Specifically, IEC 60318-4 defines “Electroacoustics – Simulators of human head and ear – Part 4: Occluded-ear simulator for the measurement of earphones coupled to the ear by means of ear inserts.”
It describes an occluded-ear simulator intended for the measurement of inserted earphones in the frequency range from 100 Hz to 10 kHz. It is also suitable as the basis for an extension intended to simulate the complete ear canal and the outer ear by simulating the acoustic transfer impedance for the occluded normal adult human ear.
There are several limitations for devices designed to meet this standard that should be understood by anyone performing or interpreting measurements.
As with everything, it’s best to approach things with eyes wide open, and understand the limitations when interpreting results.
To create IEM measurements, the following hardware is required:
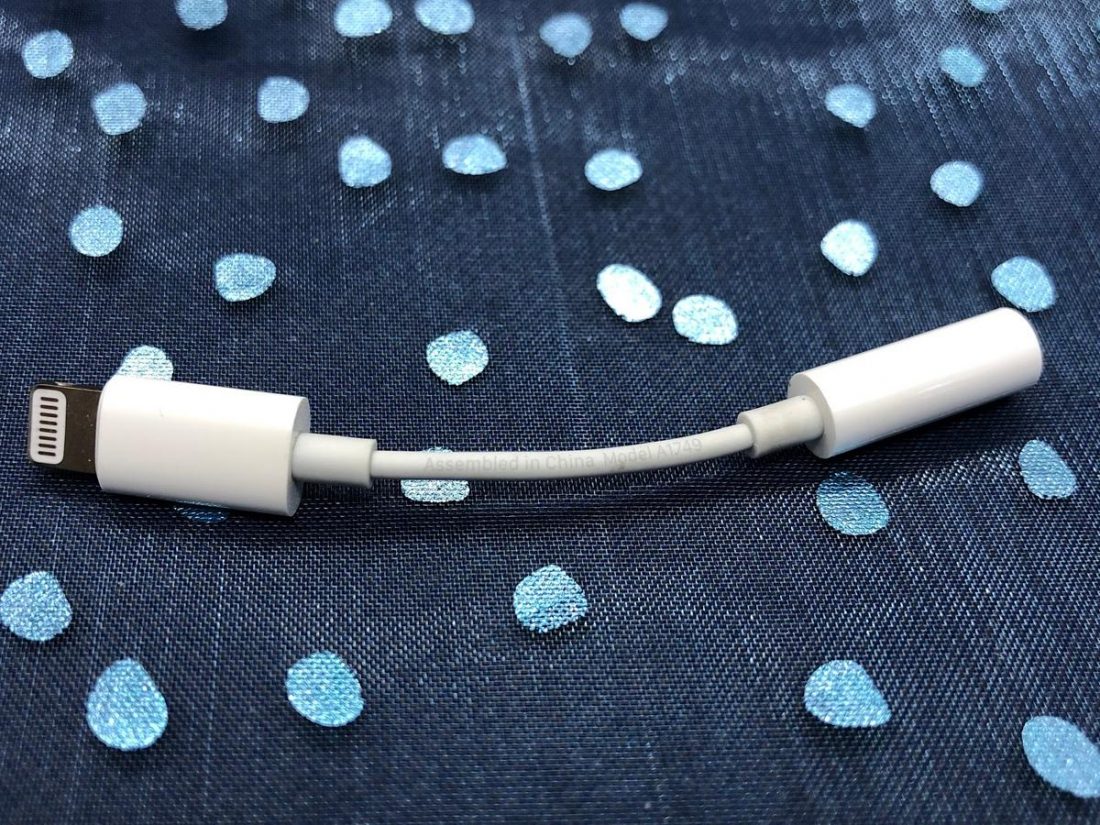
Believe it or not, that’s it. Assuming you already have an iPhone or iPad and the Apple headphone adapter, there are only two additional hardware items to purchase. A headphone/microphone splitter cable adapter is inexpensively and easily sourced from Amazon. Here’s the one I purchased.

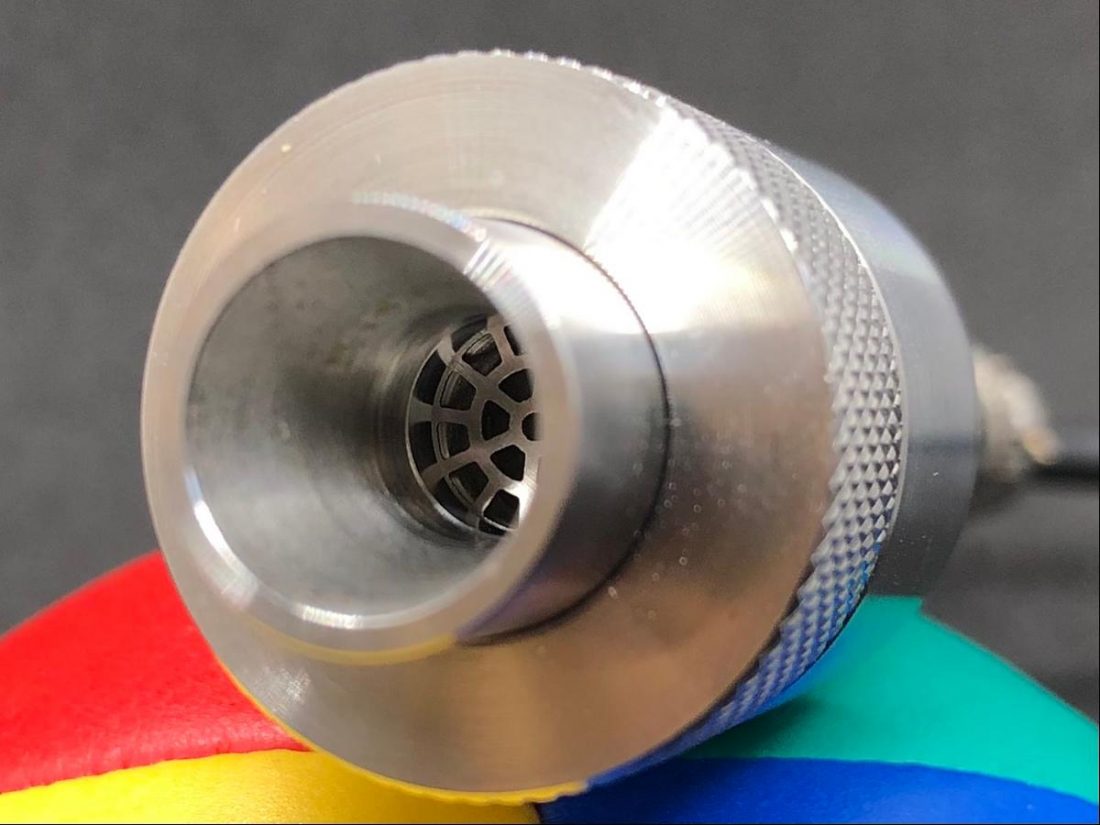
The challenge lies in purchasing the appropriate occluded-ear simulator (I’m going to refer to it as ‘OES’ for the purposes of this article). This IEC 60318-4 compliant inner ear simulator is currently only available from Taobao, a Chinese online shopping website, owned by Alibaba. Taobao is the world’s biggest e-commerce website; however, it is not in English or designed for a North American market.
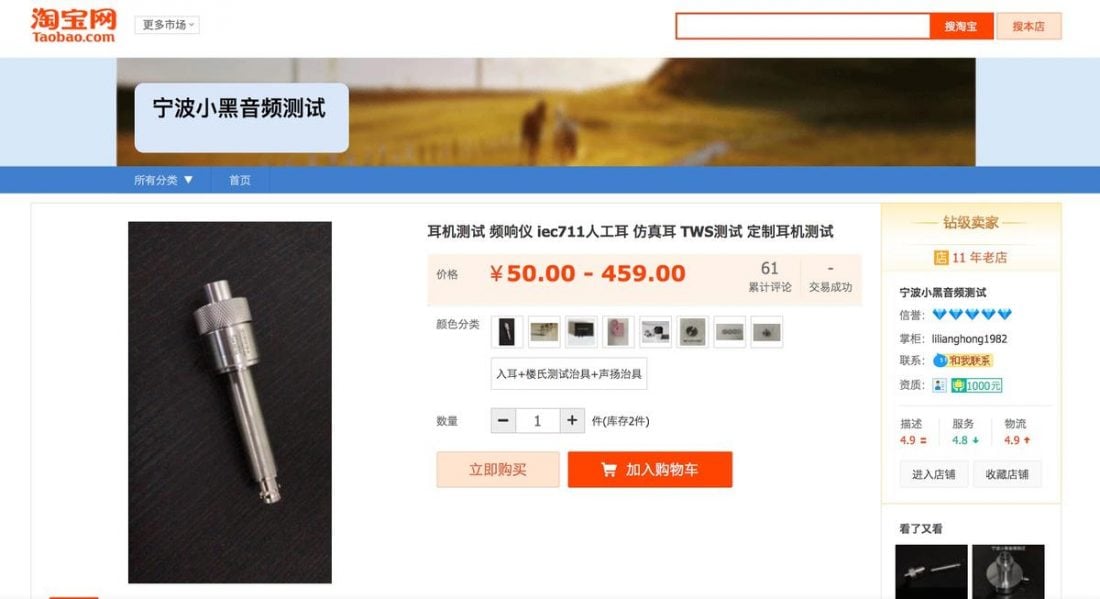
To purchase from Taobao, you will require a third-party shopping, warehousing, and shipping agent. Superbuy worked well for me as I muddled through the purchase steps for the first time. You’ll end up purchasing the product through Superbuy’s website, and they buy it from Taobao on your behalf, and then package and send the item to you.
Superbuy offers additional packaging and wrapping services before shipping, which I did ‘just in case’. The parcel that arrived was so securely packaged it took about a half-hour with scissors and knives to finally liberate the OES, which ended up being securely packaged in its own foam-lined hard plastic case.
The entire ordering process felt a bit baffling and like a leap of faith, but in the end, it all went perfectly smoothly and the device arrived safe and sound.
“Software-wise, I am using periodic noise averaging or sine sweep peak holding on iOS AudioTools (not to be confused with AudioTool on Android, which is a vastly inferior FFT program) purely for portability reasons. On my desktop, I use Room EQ Wizard with the occasional dabble in ARTA depending on what functions I require.” – Crinacle in a personal email exchange
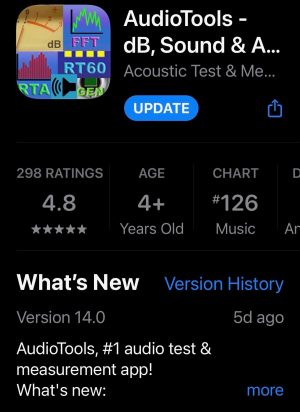
I purchased AudioTools for iOS from the App Store. It appears to be quite full-featured and does many things that I will likely never use. But, as they say, it is the right tool for the job.
GRAND TOTAL: $158.78 USD
Compared to the multi-thousand-dollar alternatives, this solution is both affordable and reasonable for the enthusiast.
The OES comes with a standard 3.5 mm microphone jack. The hook-up procedure couldn’t be easier.
1. Start by plugging the Apple lightning to 3.5mm adapter into the iOS device.
2. Plug the male jack of the microphone/headphone splitter cable into this adapter.
3. Plug the IEM cable into the marked headphone 3.5mm socket on the splitter.
4. Plug the male jack of the OES into the marked microphone 3.5mm socket on the splitter.
5. Open the AudioTools application on the iOS device.
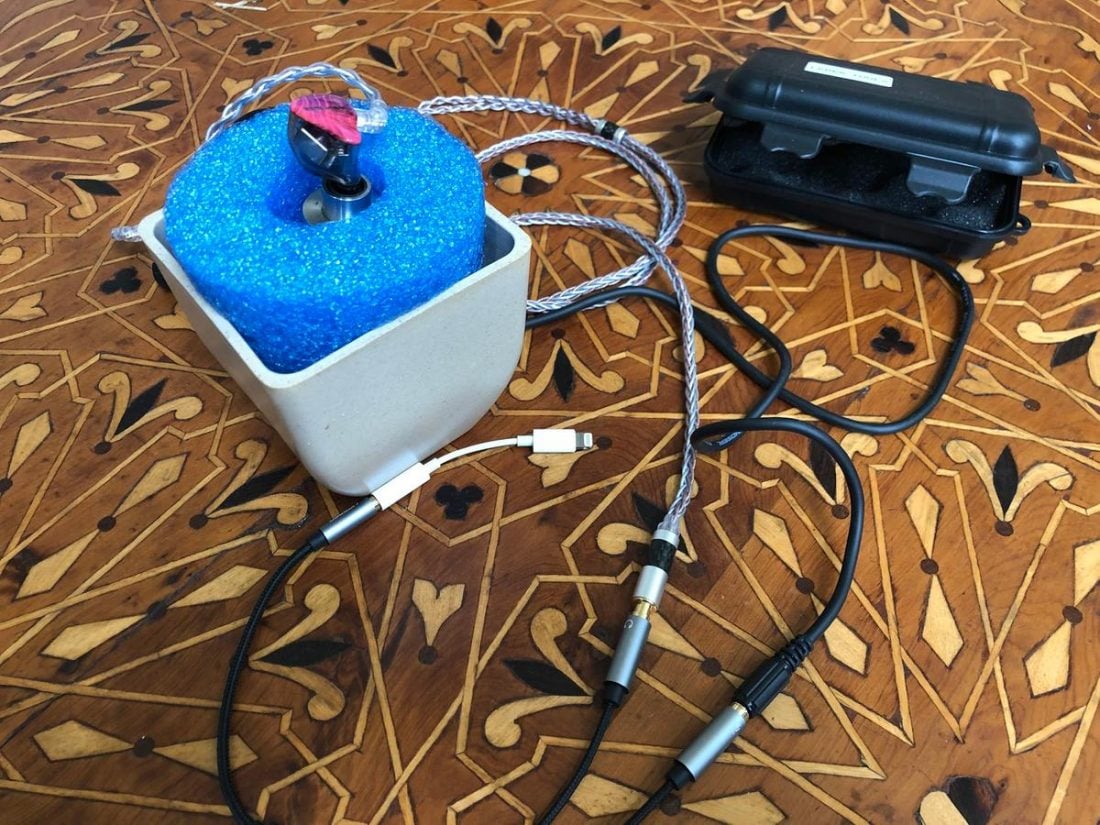
Since the OES does not have a stand (although it can be used lying on a desk or table), I cut a short length of a pool noodle and found a small flower pot to fit the foam piece. This securely holds the OES in a vertical position and can be adjusted to provide support for the inserted IEM.
This setup also works to measure wireless IEMs. Simply skip step 3 ‘plug in the IEM cable’ step and connect the IEMs normally via Bluetooth.
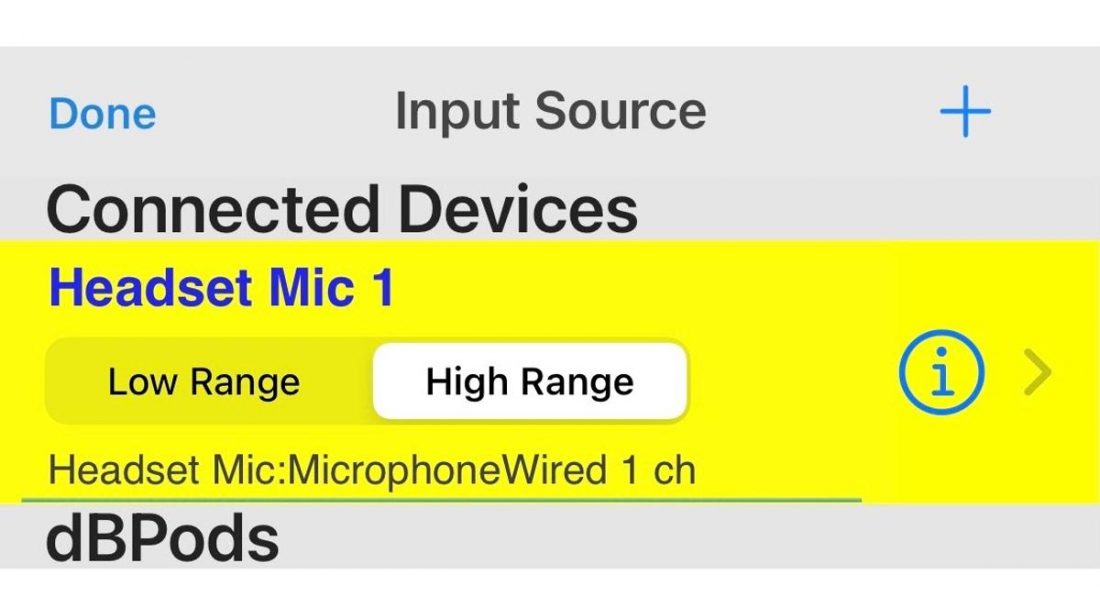
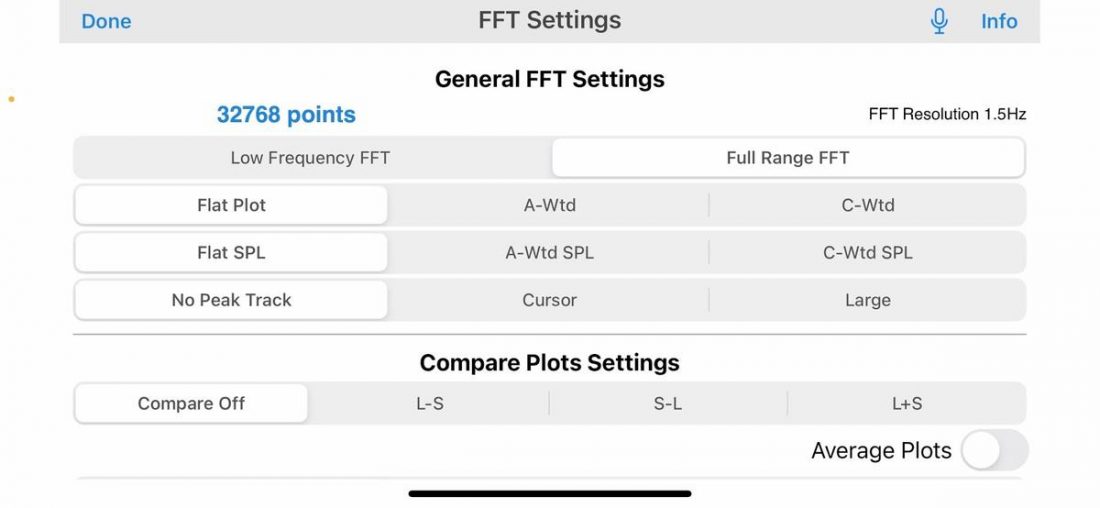
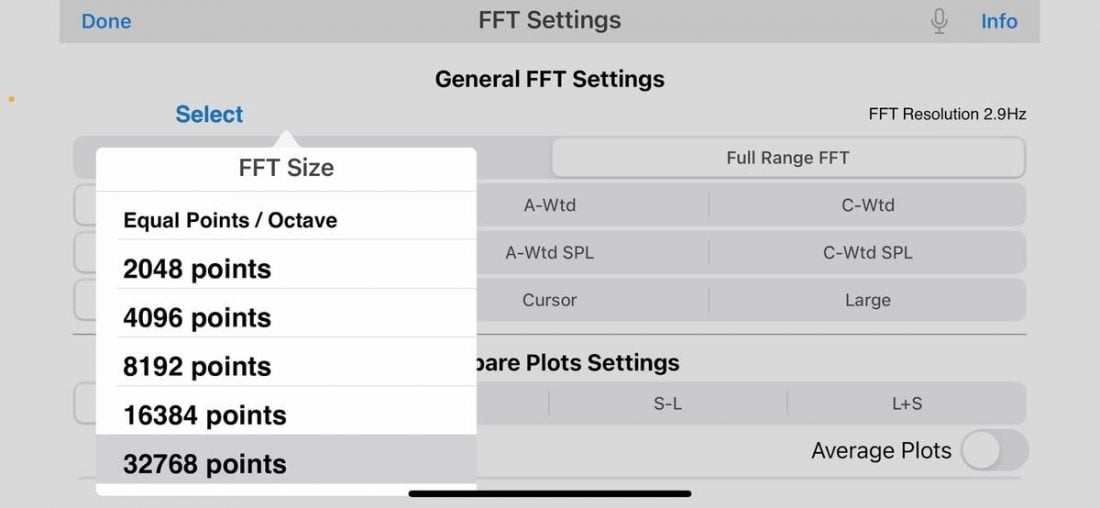
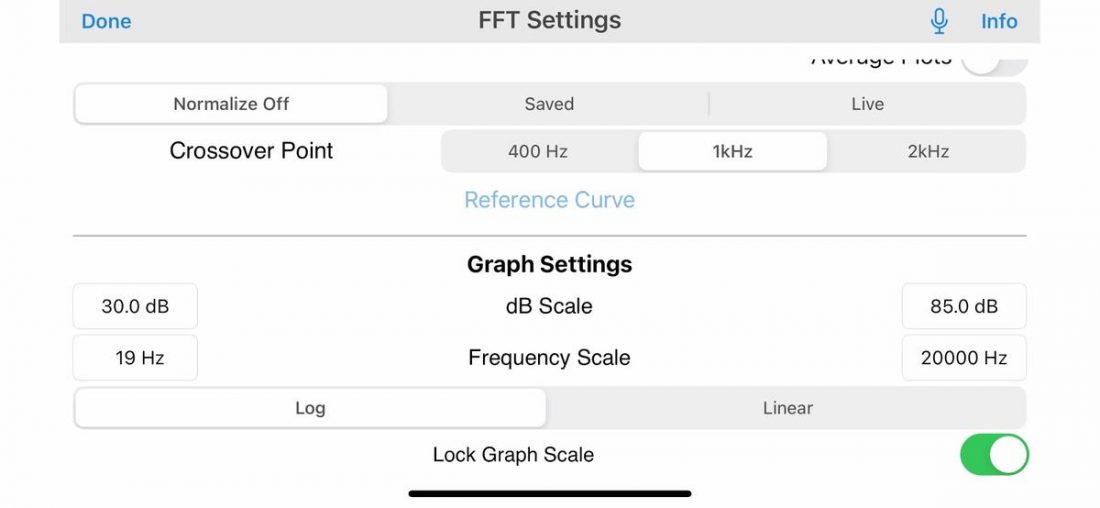
In the AudioTools software, a few basic settings have to be changed. This is perhaps the most complicated part of the process, as nothing is documented. Again, I appealed to Crinacle for his recommended settings, and I did my best to replicate them.
I may not have interpreted all of Crinacle’s instructions accurately and any mistakes are mine alone.


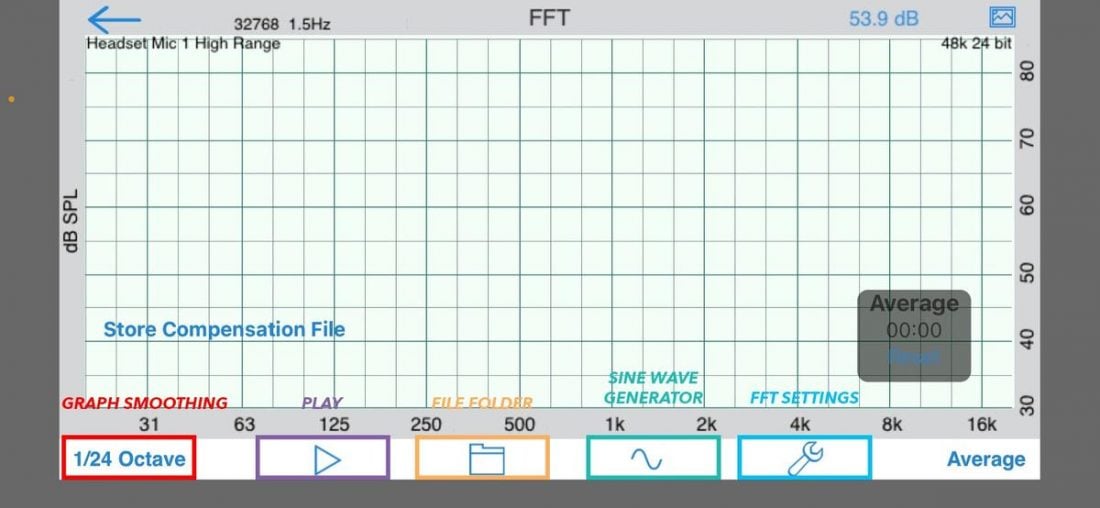
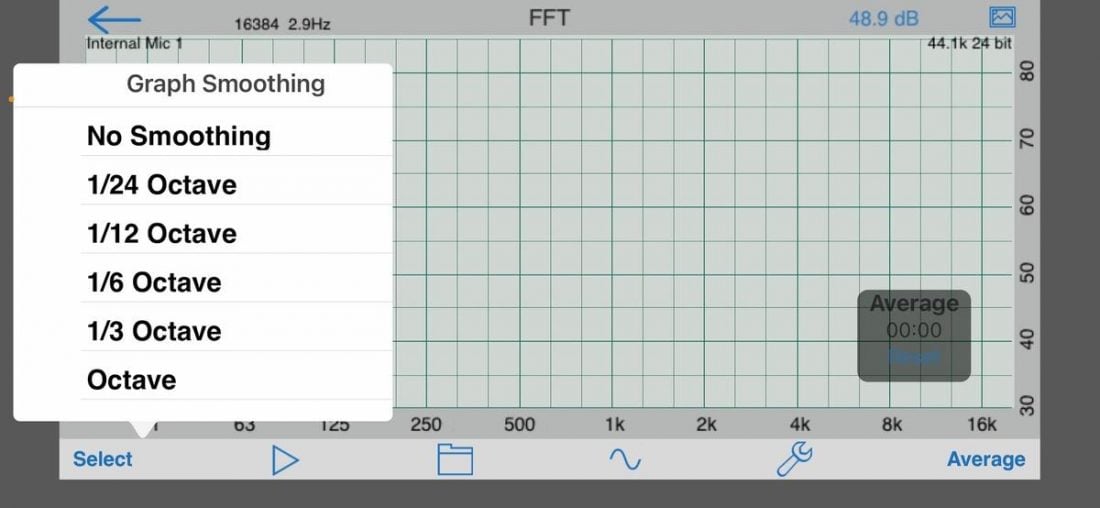

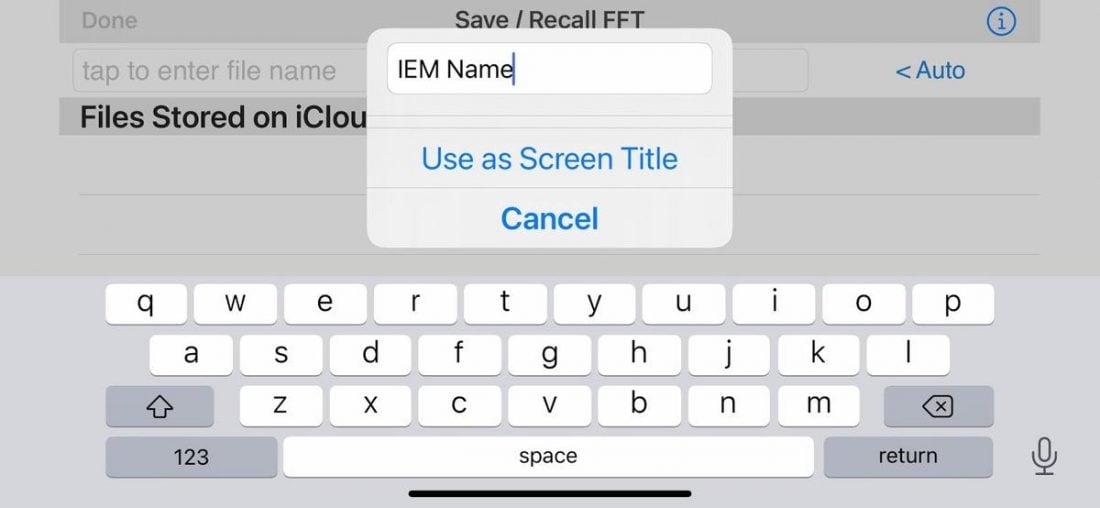
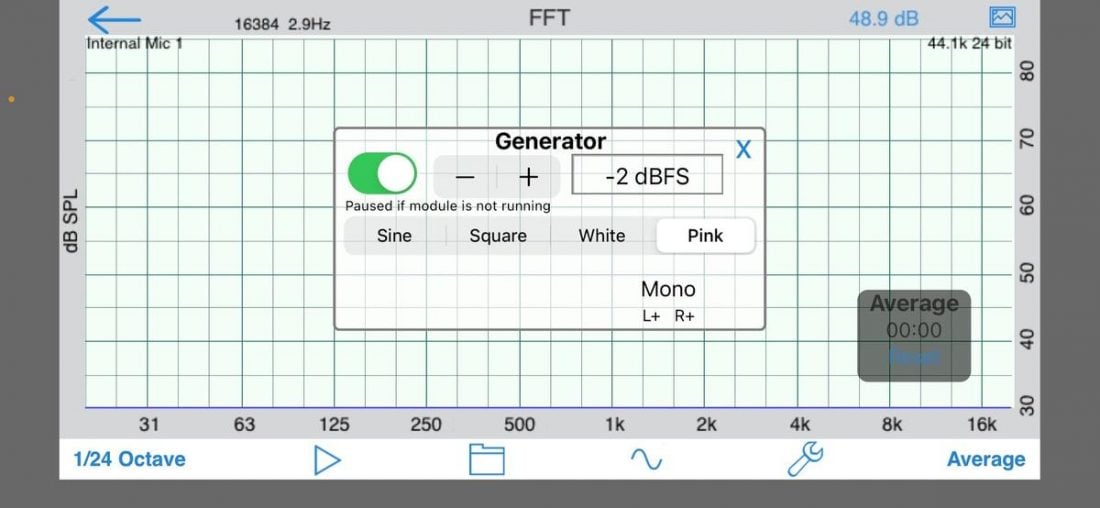
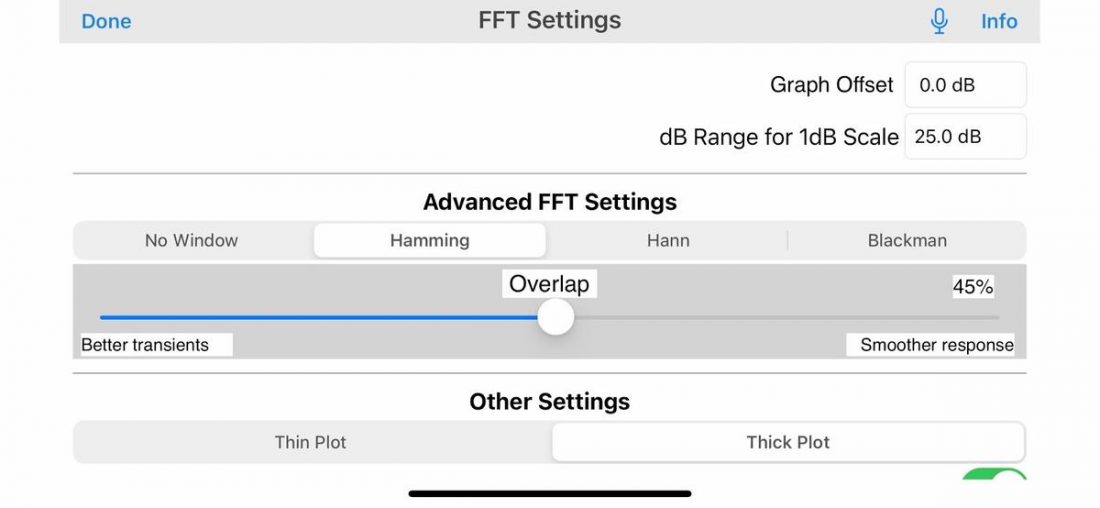
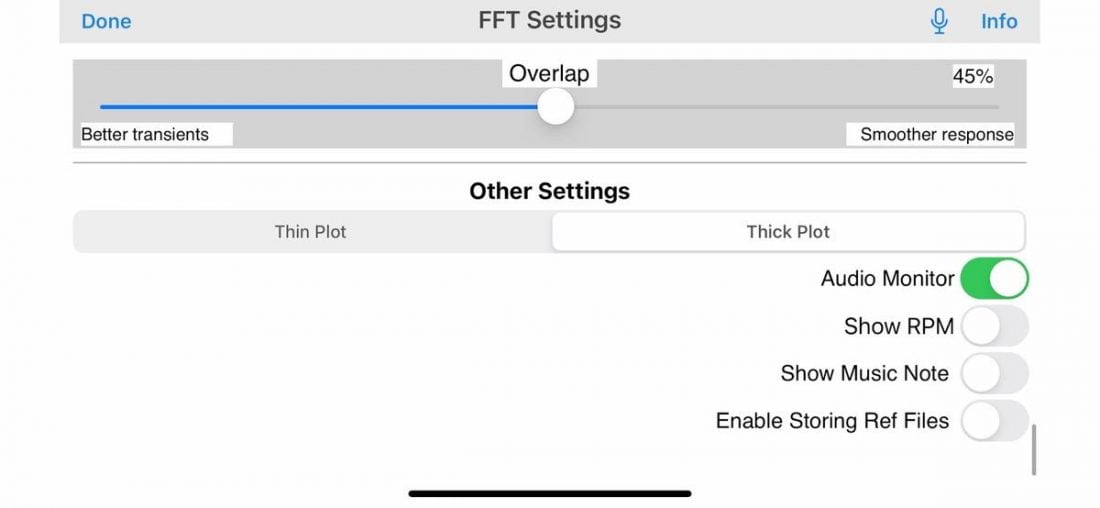
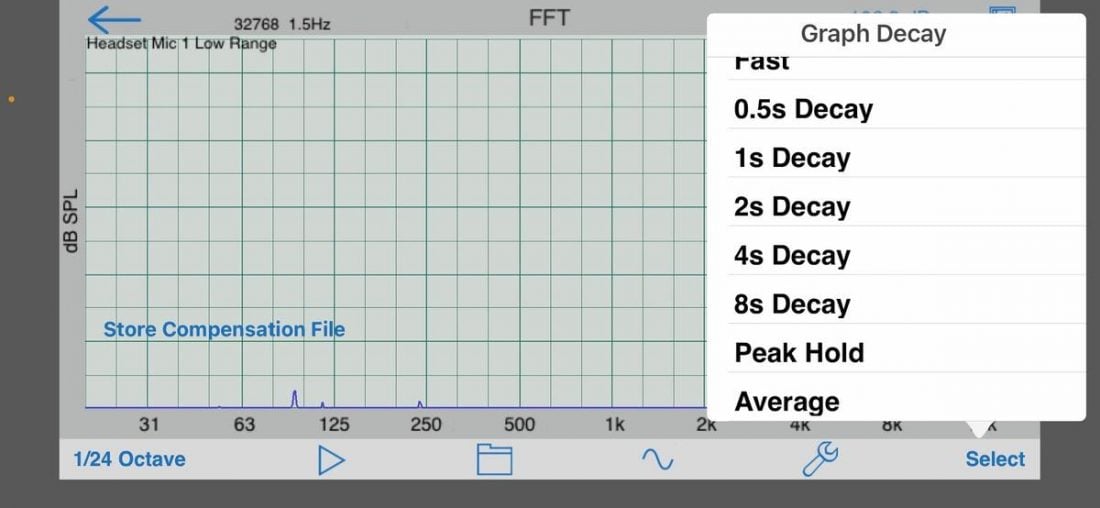
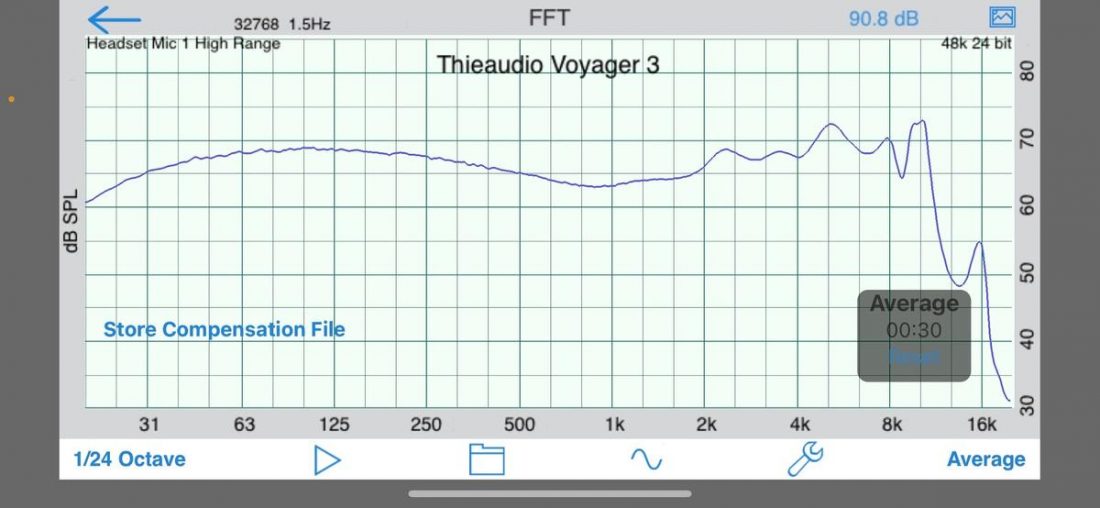
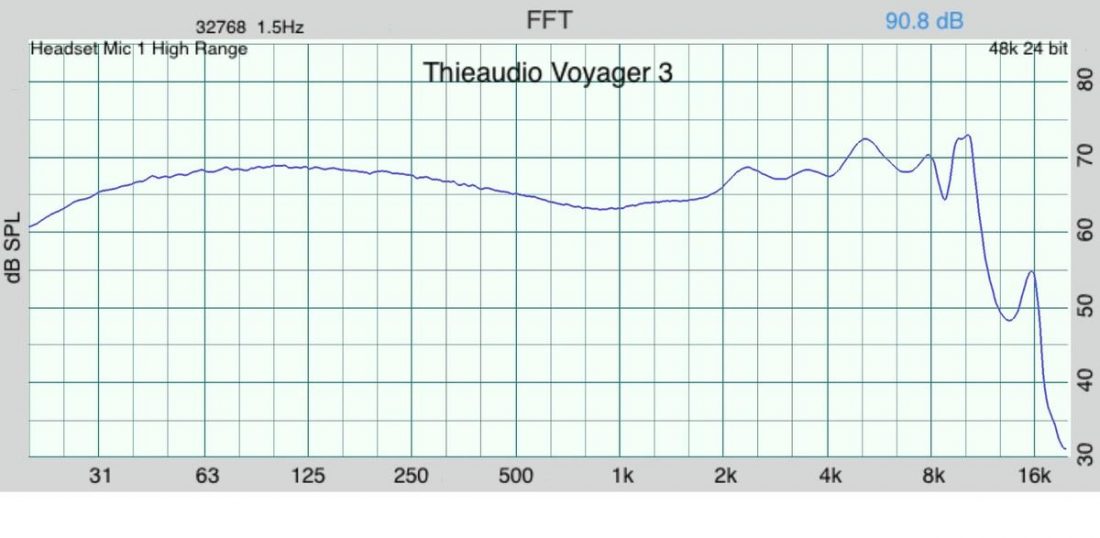
Once all the above setting changes are made, the basic steps in taking measurements are:
I highly recommend this method of performing IEM measurements. It’s simple, portable, and fast.
Not to mention affordable.
Is it perfect? Absolutely not. But it is a great solution for most enthusiasts. It’s also far easier to obtain repeatable results than attempting IEM measurements using the miniDSP EARS.
So, hopefully, you will no longer wonder how the measurements are obtained for my IEM reviews on Headphonesty. If you are looking for an effective way to measure and compare your IEMs, I trust that this guide will help you make educated decisions on your options.